Friday, December 23, 2016

Miss Kate Christmas Signs

Are you ready for Christmas and have you had some time to craft?
I am ready and I did do some crafting this year. I am totally addicted to making these holiday signs.
I'm sharing these on the Miss Kate Blog Today!

I picked up the bases at Target in the Dollar Spot for $3. They are chargers. I have been seeing them all over Facebook in some of the groups I belong to since early November and every time I went to Target I checked for them with no luck. One day in mid December I went in and spotted them! I was so excited and bought a dozen of them.
I am so glad I did - I have been having so much fun creating these signs.


Here are my steps...
I select the Miss Kate file I want to use and add personalized copy

Cut 631 vinyl (not permanent type) on my Cameo

Weed out the areas I want to paint and transfer to board using contact paper. 

I then do a dry brush technique, sometimes 1 coat, other times 2, depending on the looking I'm going for. 

Let partially dry and peel off vinyl.
(If you wait until it completely dries it may bleed) 

That's it. I made these for a friend and my nieces. They all loved them!
Here are images of each design and I will list the Miss Kate file under each.
Birch Trees with Deer

'Tis the Season Phrase

Believe

Tis The Season Phrase

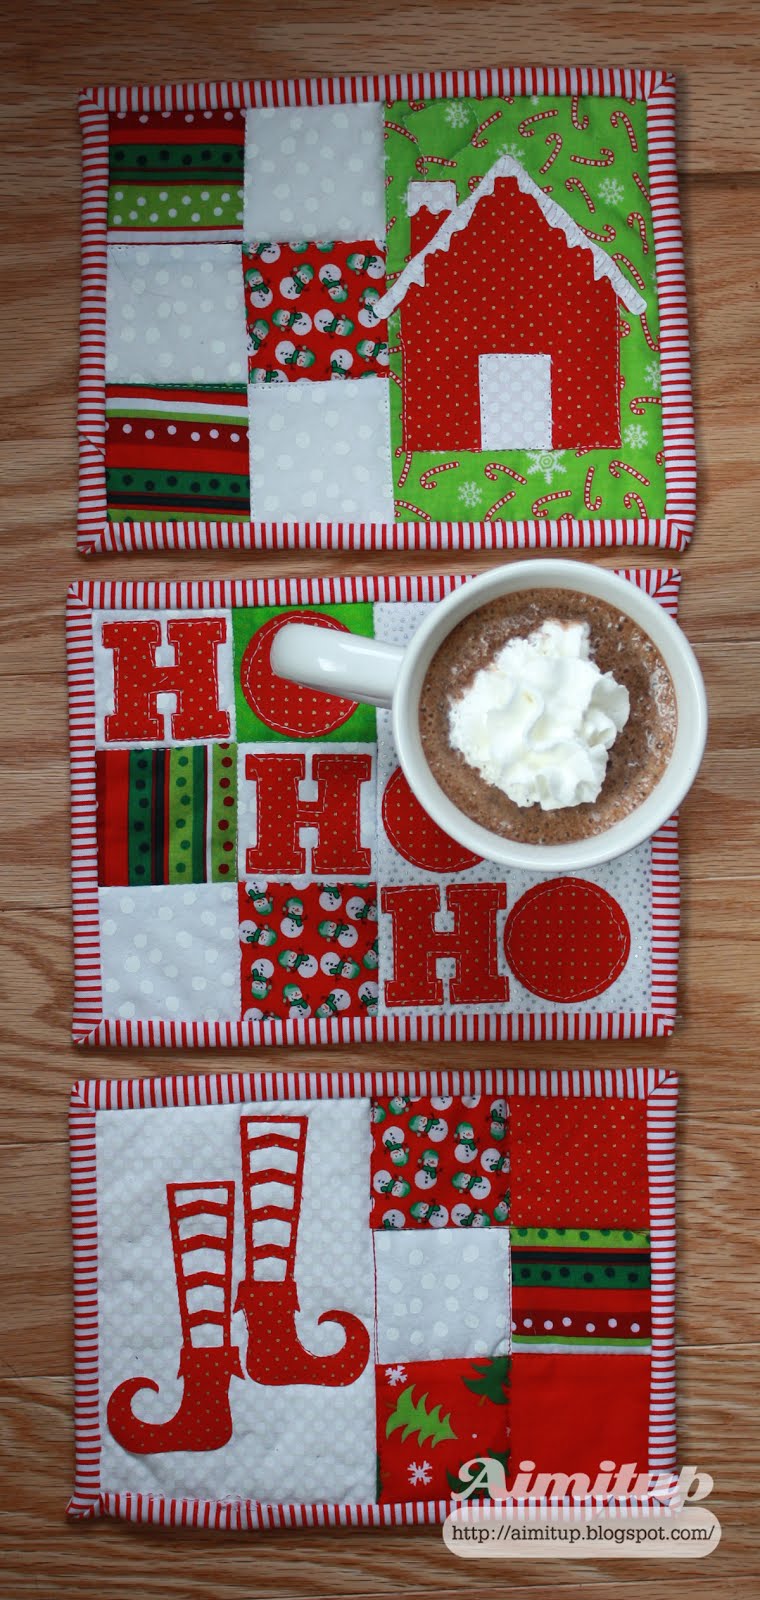
I also created this table runner for Christmas.


I cut the little bow on my cameo and stitched around it to secure it.


You can get the table runner free tutorial here on Julie Cefalu's blog.
It is really easy to follow along with great instructions and visuals!

Wishing you all a Happy Holiday!

Wednesday, December 21, 2016

Vintage Truck Box Card & JOY Sign

Hello Everyone! Hope your holiday projects are coming along!
I recently purchased an amazing kit from SVG Cuts.


I made 7, Yes SEVEN! Vintage Truck Box Cards for my sons' teachers.
They were so easy to put together and when I showed my boys they said "WOW!"
If you aren't familiar with Box Cards - they fold up and fit perfectly in an envelope.


I look forward to making some of the other elements from the kit.


I have another project to share with you today. I have a friend, well more like a sister, (my sister-in-law's sister) who just got a Cameo. I gave her a few basic lessons and she created this fabulous JOY sign for me on reclaimed wood. I absolutely love it and had to share with you!


See you on Friday. I'll be sharing a Miss Kate project!


Monday, December 12, 2016

Miss Kate December Challenge

Hello! Today I'm sharing a few Christmas projects. The Challenge over on the Miss Kate Galleria Page on Facebook is Winter/Christmas. 

For my first project I created a chalkboard sign. I cut vinyl on my Cameo and applied a stencil to the chalkboard. I then painted with acrylic paints. I also painted the wood frame.


I did leave off the red dots.


For my second project I took the same file and did a print and cut.
I added these to Christmas cards.


Did you notice the quilted piece I used in my photographs?

I created it from a pattern from Julie - The Crafty Quilter. She offers a great free tutorial on her blog. Here is the link to the tutorial.
Here's a closer look at my Crumb Catcher:


Don't forget to enter the Challenge on the Miss Kate Galleria FB Page!
Also stop by the blog to check out all the design team projects.

Hope your holiday preparations are going great.


SaveSave

Sunday, December 11, 2016

Gatefold Birthday Cards

Hello Everyone - It's my turn on the Miss Kate's Blog. I like to give handcrafted Birthday Cards throughout the year. I like to create a bunch at a time so I have them whenever I need them.

I use the Print and Cut method on my Cameo for the cards. I first select all the elements and open them in the Cameo Designer Edition software. I print this out and include the registration marks.


I then trace the elements and do an offset. (This is indicated with the red outline on the image below.) I place the paper on my mat, detect registration marks and then select the outline areas and indicate those to cut.


Here are my cards:
These are both gatefold cards and I'm sharing the outside and inside views.
The flat card is 10" wide x 7" high and each fold comes in 2.5" from the edges.

I used the following Miss Kate files:


Thanks for stopping by today. Hope this gives you some inspiration to get some Birthday Cards completed for 2017!

Friday, December 9, 2016

Holiday Craftiness

Hello all! Welcome to my blog!
Today I'm sharing some holiday projects. 


Here is a paper project I created. The file is from SVG Cuts - Santa's Sweets SVG Kit.
It was so fun to put together and will look amazing on my cookie table at my holiday parties.
I picked up the stand at Target in the dollar spot. I'm thinking it may need some vinyl to personalize it.


I also had some fun with my sewing machine. I created these mug rugs! It's a little quilted rectangle to hold our coffee, tea or in my case hot chocolate mug.


I used 2 1/2" inch squares for the sides. I cut some fabric with my cameo to accent the mug rugs. I just ironed on some fusible web, added the fabric to the Cameo mat and cut away. 


The SVGs are from Miss Kate. I used elements from the Ho Ho Ho Title, Elf Shoe Set,  
(I am not sure where I got the house from - forgot to make a note of the file!)


Hope you liked my holiday projects and hope your holiday cookies, shopping, decorating and crafting is coming together nicely!

Stop by on Sunday to check out my Miss Kate Design team project.


Saturday, November 19, 2016

Best Days PVPP Canvas

Hello All! I have a simple PVPP Canvas to share with you today. You may be thinking what the heck is PVPP? Well it stands for Paint - Vinyl - Paint - Peel.


First you flood Paint the canvas the color you want your letters. On mine I used a cream.

+++

Next you add the Vinyl letters. (check out my previous tutorial here for details)
As an option you can then add another coat of the initial Paint color to seal the vinyl down. It ensures crisp letters. Let dry.

+++

You then Paint your background color on the canvas. I used a blueish/gray mixture. I left some streaks in there since that was the look I was going for.

+++

Last step - Once canvas dries, Peel off the vinyl with an Xacto Knife.

If you'd like to check out other canvas projects click here & here & another one here.

Thanks for stopping by today!

Sunday, November 13, 2016

Over the Moon Layout

Hello and welcome to my blog. Today I'm sharing a baby shower scrapbook 2 page layout.
For my project I used Miss Kate's Paper Die Cuts. 
These are from the Baby Boy Collection.


I just love the Over the Moon Title.
I accented my layout with Sequins from Fleurette Bloom.
They added the perfect amount of sparkle to make my layout pop!


I also layered a few of the die cuts and placed the heart on the booties.


Here is the right side layout.


The cow jumping over the moon is so cute and love the variety of die cuts.


Thanks for stopping by today. Don't forget to grab the Miss Kate's Freebie of the day and also check out my post on the blog.

Tuesday, November 8, 2016

Fall Challenge at Miss Kates

Hello Everyone! Fall is such a nice time of the year especially in Western PA where the leaves are in full color. Miss Kate's is having another challenge for November and the theme is "FALL".

Here is my layout I created. It was was from back in 2005 and a part of my 2nd son's baby book.


I just love these cute crows on the pumpkins. It was a lot of paper piecing but I had a blast putting them together.


The crow standing on the pumpkins is from the file Autumn Crow.
The title and falling leaves are from Autumn Word Art.


This cute little crow is from Crow Behind Pumpkin.


I used the pen tool to create by journaling on the tag.

Stop by the Miss Kate Facebook Galleria Page to check out the other design team member's projects and don't forget to enter the challenge.


Monday, October 31, 2016

Fall & Christmas Mini Quilts

Along with playing with paper I've also been playing with fabric too. I recently joined a quilt group and signed up for a sampler quilt class. I did 12 different 12x12 blocks. It is currently at the quilters for machine quilting. I will be sure to share photos once I get it back and bind it. I did a few blocks where I cut fabric on my Cameo and appliquéd it to the quilt block. (click here for a previous video tutorial on how to cut fabric on the Cameo.)

I discovered an amazing quilter's blog - it's called The Crafty Quilter. There was a tutorial for an Amish Mini Quilt that caught my eye. Since I'm new to quilting the great PDF instructions were perfect for me to understand.

I made this Welcome Fall Mini Quilt: 


I placed it on my kitchen table and just love how it turned out.


I also decided to create a smaller one for Christmas.
I just skipped the outside strips and corners.


Here is a close up look.

Hope you liked the Mini Quilts I shared today.
The Crafty Quilter is having a link up on her blog - if you create with fabric stop by and link up!